[ExpertPhotography is supported by readers. Product links on ExpertPhotography are referral links. If you use one of these and buy something, we make a little bit of money. Need more info? See how it all works here.]
How to Take Wedding Detail Shots
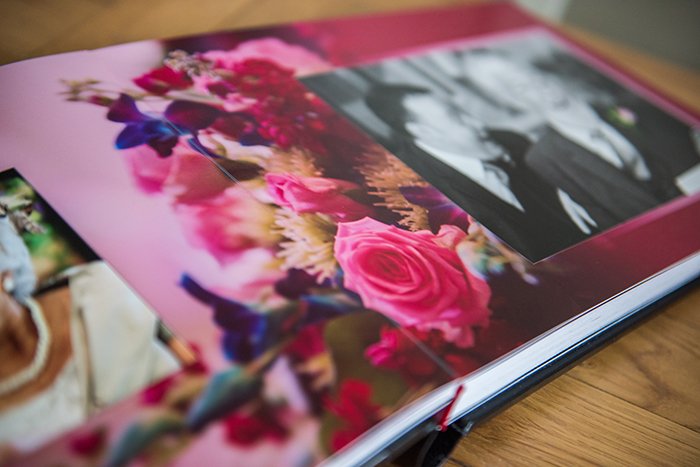
The first thing to consider when taking any wedding detail shots is how and where each one might be used. Perhaps you will be supplying a wedding album to the couple. Or possibly designing a sample one for your own experience or to promote your photography. It’s important to think about the orientation (i.e. portrait and landscape) of your detail images. These may not end up as the main focus of any given page in the album. But they can make fantastic backgrounds on which to layer your more people-centric shots. If you’re unsure about which type of album you might end up supplying, it should only take an extra second or two to compose and shoot both landscape and portrait so all bases are covered.
Wedding Details Shot List: The Must-Haves
Having a specific wedding details shot list will help hugely. Here are 7 ‘must-have’ image types to include, in approximate wedding day chronological order.
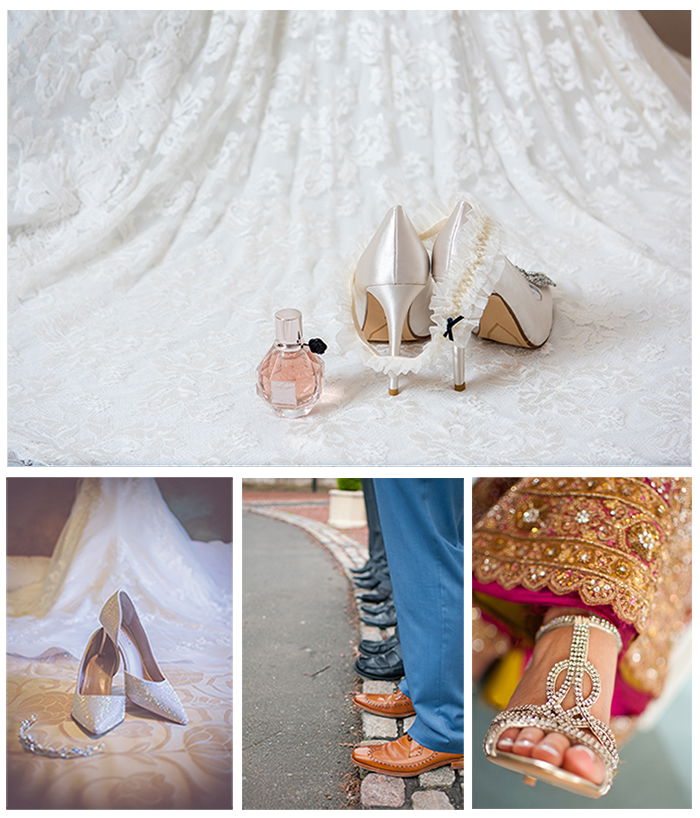
Shoes and Accessories
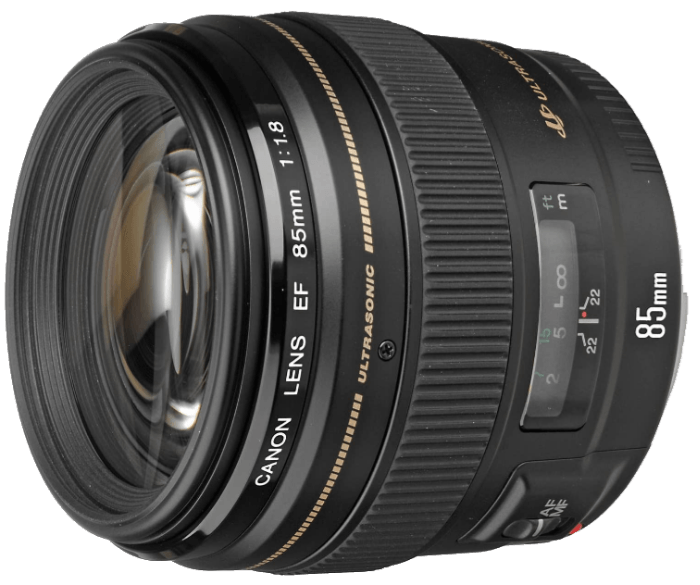
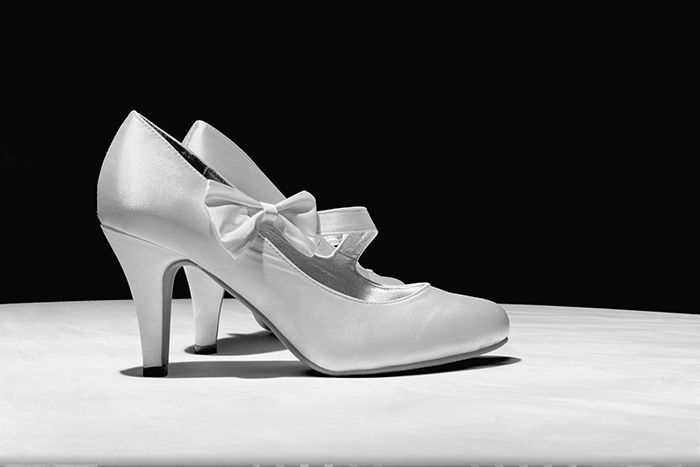
As soon as you get to either the bride or groom prep venue, the first thing you should shoot are the shoes and accessories. Yes, bride and groom. A lot of guys will buy new shoes specifically for the day. While you might think they wouldn’t be interested in photos of their shoes, a nice shot of the footwear in pristine condition (with the logo emblazoned box if they’re an expensive brand or make) will always be appreciated. For the bride, it’s a no-brainer. Take wedding jewellery shots with the shoes, along with other items like a garter or any gifts that the groom has given. A shot of the shoes with the bride’s dress hanging up is also a nice touch. The best lens for this would be anything with a wide enough aperture to throw the background out of focus. This keeps the attention on the shoes. I tend to use a 35mm f/1.8. This allows me to get in nice and close for maximum sharpness and details. This also lets me get a little more into the frame (like part of the dress) if I back up a little bit. If you don’t have a wide aperture lens, then another trick is to throw some light on the shoes and expose for the highlights. This makes everything else in the frame go dark. When lighting wedding details this way, there’s no need for anything fancy. A simple desk lamp directed towards your subject can work here. If you have an off-camera flash, though (even a cheap Yongnuo YN560-III and trigger will do), now is a great time to put it to work.
Flowers
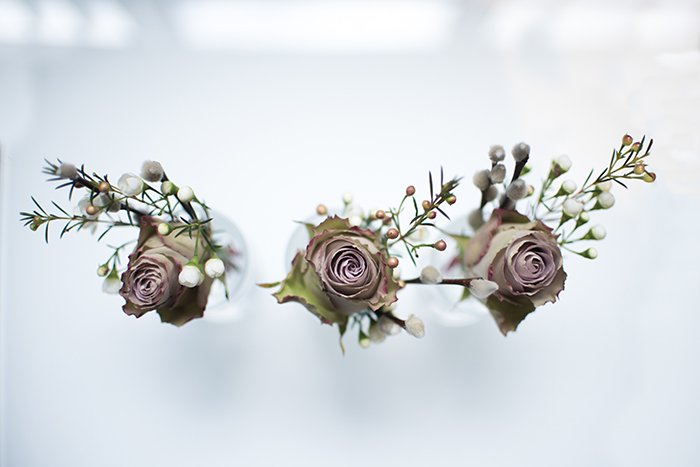
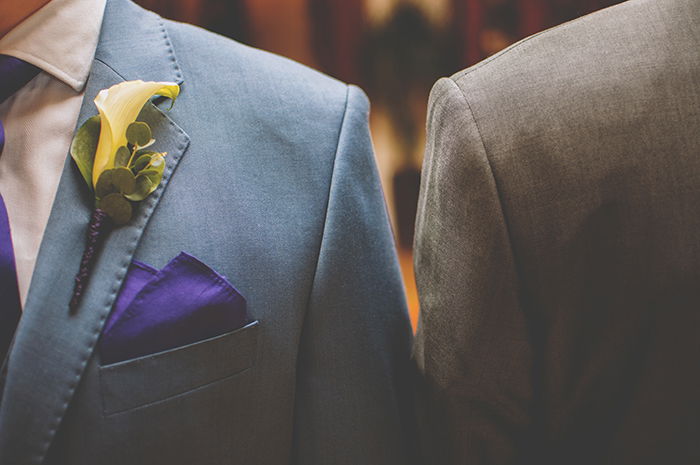
Say you’re shooting the bride’s preparation in the morning (which you really should be if you can). You’ll often find that the florist will deliver the bouquets and buttonholes a short time before you leave for the ceremony venue. It’s best to grab these as soon as they arrive for two reasons: Firstly, stems, petals and other foliage can quickly get snapped or drop off when handled for any amount of time. Whilst you can often fix stray stalks in post, aim for shooting them in perfect condition. Secondly, it’s very easy for time to run away with you when shooting the wedding details shots in the morning. Once you’ve photographed the shoes and wedding jewellery shots, you’ll want to shoot the bride’s hair and make-up being done. Also, some fun shots of the bridesmaids with the bride, the mocked up ‘bridesmaids helping with the dress and accessories’ shots, and so on. Before you know it, the bridal car will be outside and you’ll need some shots of that too. As such, it’s always best to shoot the flowers as soon as you can so they aren’t forgotten. Shoot the flowers against a neutral or plain background. Preferably with them stood up on their end (this will depend on the bouquet though). As with the shoes, some angled, off-camera light, or some diffused natural light from a window just out of shot, will make the image come alive. Later on you’ll want to shoot the gents’ buttonholes while they’re wearing them. There’s no need to include faces here. You can even engineer a more creative shot by excluding them, as in the shot below. For both the bouquets and buttonholes, I tend to use a longer focal length if I have the room, typically the 135-200mm range. This is to make use of the compression offered by these longer lenses to give a shallower depth of field.
Wedding Photographer Pro Tip
Shoot the flowers with the florist’s business card, compliment slip, or logo. Supply these shots to them after the couple have their images. In fact, any time you are able to shoot and share some product shots of services supplied by external vendors (the hair and make-up artist, the cake, the DJ, a Master of Ceremonies, or even the venue building itself, etc.) then you should. This can be a great way to build up working relationships. And it will encourage the vendors to suggest your services to any of their future clients.
Ceremony Details
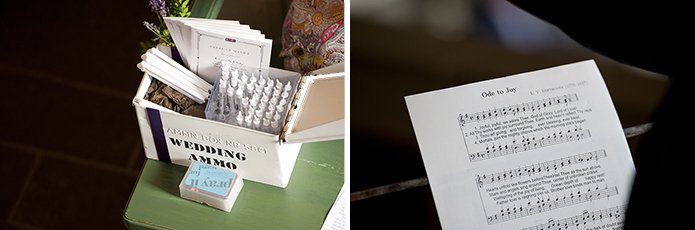
Of course, catching all the requisite full length shots of the bride and groom at the altar is a given. But you’ll also want to look around for any personal touches the couple have added or asked for in the ceremony venue. Think floral arrangements matching the bride’s bouquet, the pianist’s sheet music (as the couple are likely to have requested these songs themselves), or any other creative items added that depict the couples’ interests or hobbies. All these little details matter to the couple and you’ll impress them if they feel you’ve realised their importance. You will more than likely be forbidden from using flash during this part of the day. A wide aperture lens of any focal length will allow lots of available light in, to properly expose your shot without raising your ISO too much.
Wedding Party
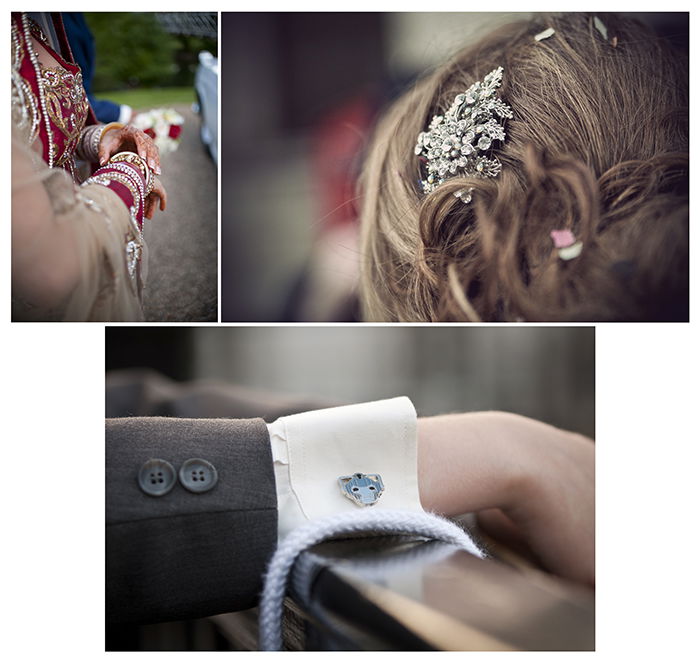
The wedding party detail shots is one of the easier tasks of the day. You can usually capture them by just wandering around during the canapés after the ceremony. Images of the bride’s hair brooch that belonged to her grandmother, or maybe the groomsmen’s novelty cuff-links are the sort of things you’re looking for. Along with any parts of the bridesmaids’ dresses or groomsmen’s suits that are unique or that stand out. The lens used for these is completely dependent on what you’re shooting the candid group portraits with at the time. Getting these wedding detail shots is more about constantly keeping one eye on potential opportunities than it is about lens choice.
Spontaneous Intimate Moments
These moments can happen at any point throughout the day due to them being, well, spontaneous. Like the wedding party detail shots, a lot of this relies on having a keen eye. These shots could be anything from the bride giving her parents a small, personal gift before the ceremony, to the bride’s elderly grandfather delicately looking at his granddaughter’s ring after the ceremony. Or even something as simple as the groom holding up the bride’s dress as she walks, with his wedding ring showing.Once again, this is less about the lens choice than it is about being able to judge when something like this might happen. Any lens you happen to be using will work.
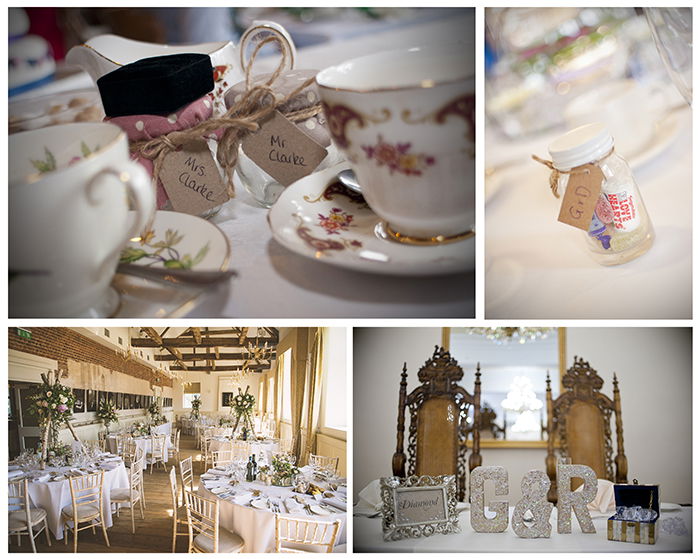
Reception Room
Of all the Wedding details shots, this is probably the most time-critical. You need to gauge this perfectly between the venue staff finishing their setup and guests starting to filter in and move things. Most likely, you’ll find time to sneak away during the canapés just after the wedding ceremony or shortly after you arrive at the reception venue. There are quite a few other wedding detail shots besides the room itself. This is likely where the bride and groom spent most of their decorative efforts. Make sure to capture any personalised items on the top/sweetheart table. And don’t forget the bride and groom’s place settings together (especially if using their names as Mr. and Mrs.). Get some longer shots along the top table. These should show all or most of the settings, guests’ place setting cards, (or objects if personalised or unusual), wedding favours left for the guests, and floral arrangements and center pieces. Photograph each table in full, showing the table name if personalised, the cake, and then a full room shot from at least two angles. If you shoot it in this order, from smallest to largest, then it matters less if a guest wanders in and moves something on the table. You’re much less likely to see it in a wide shot of the whole room than you would taking a close up of the table. Shooting this way should also take you no more than five minutes. For lens choice, there are a couple of options here. Consider using a 35mm or 50mm prime for close-ups and table centres. This is, again, to maximise sharpness and details, with a wide aperture. For the whole room shots, anything from 16mm to 24mm would work well, depending on room size. Remember that with wide angle shots, aperture size matters less as pretty much everything will be in focus.
Rings
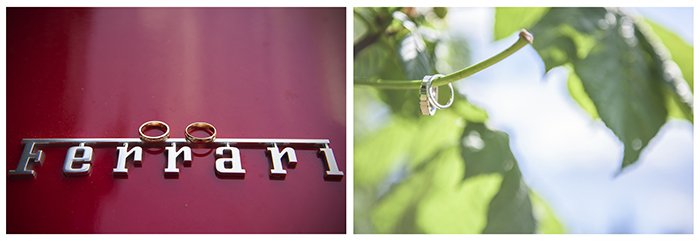
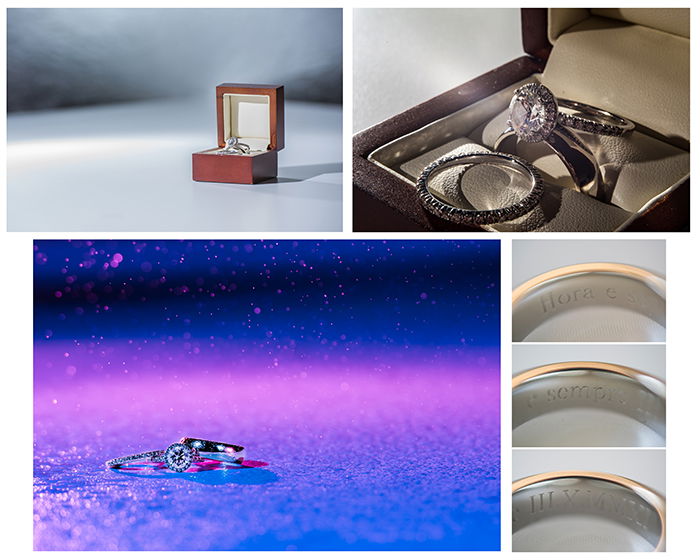
Unquestionably, these are the most important of all wedding details shots. The best time to shoot wedding ring photographs is when the reception meal is happening. You’ll have around a hour or so between the guests taking their seats to eat and the speeches starting. I’d recommend not shooting the guests during this time. Photographing people while they’re eating never results in great pictures. And it tends to put people on edge at best and annoy them at worst. It’s always a nice idea to include something from the venue’s surroundings. Or something the couple have specifically arranged when shooting the rings. For example, think about hanging them from a small twig on a tree branch if you’re out in the countryside. You can use a grand mantelpiece, a piano or maybe an ornate vase if you’re in a large stately manor, or simply using the wedding car. Little touches like this will bring memories of the venue flooding back to the couple every time they view the pictures. Always be on the look out for backdrops or props that are indicative of where you are. After this, you have the opportunity to get really creative. You can add things like gelled flashes and droplets of paling water to create something incredible. Your imagination is really the only limit here. You should always aim to shoot the rings on their own as well as in the box(es). If there are any engravings on the insides of the rings, it’s imperative to capture that as well. A solid five or six differing wedding ring photographs will suffice, with maybe a few more if they or the box are particularly unusual. Given the intricate nature and size of most rings, a macro lens of around 100mm works best here, but if you don’t have one of those, a reversing ring will work well for extreme close ups which will help for maximum sharpness and details.
Conclusion
Of course, this list is not exhaustive. There could be a whole host of other small details to capture on the day but with these essential images in the bag, along with all the other shots taken, you will help keep the couple’s memories of the day alive for years to come.