[ExpertPhotography is supported by readers. Product links on ExpertPhotography are referral links. If you use one of these and buy something, we make a little bit of money. Need more info? See how it all works here.]
Sky Photography: Where to Find That Beautiful Sky
That might seem obvious, right? But it’s amazing how often the first principle of capturing a great sky photo gets overlooked. Any outdoor photography means that you rely on the conditions. If those conditions are not right, you won’t be able to capture a great photo. No matter how amazing the scene in front of you is, if you have a blanket of white clouds and muted light, the photo will look flat and uninteresting. But add some dramatic clouds or stormy weather and the whole photo changes. Your starting point for any great sky photography should be research and patience. Check the weather forecast and wait for the right conditions. Only that will give you the photo that you want to capture. Here are the 12 most useful landscape photography apps that will help you find that gorgeous sky.
When Is the Best Time of Day for Dramatic Sky Photos
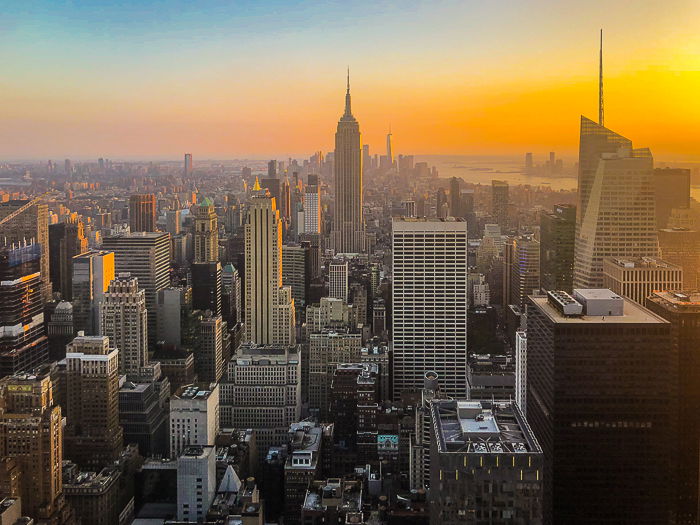
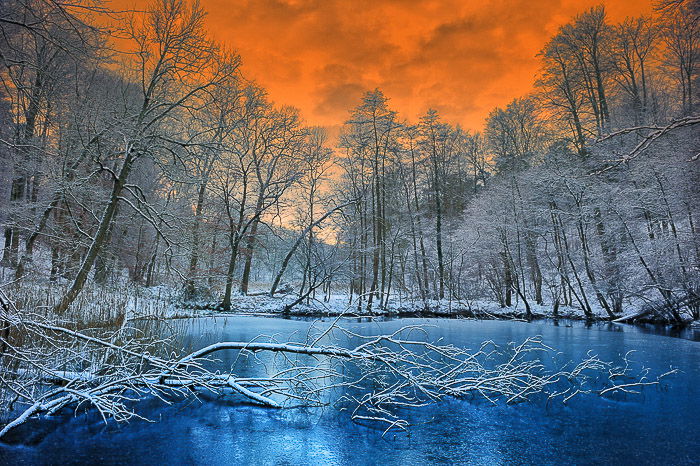
Light is one of the most important components of any photo. Great sky images will usually have wonderful light in them. This will often be during the early hours of the morning and late afternoon. The softer and more golden color light can make any scene look beautiful. But also when the sun is very low like around sunrise and sunset, it can also have an incredible effect on the clouds. This is when you will get that stunning blue and orange sky or even the more dramatic red sky.
Why You’ll Still Need Some Clouds
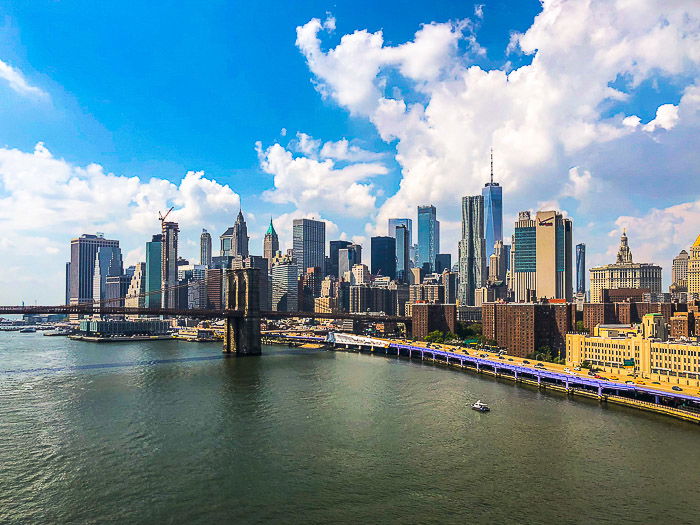
Clouds are an essential part of capturing good pictures of the sky. But the key is having the right type of cloud for the photo you are taking. For blue sky photography during the day you’ll want some big fluffy white clouds. These can add interest to would otherwise be a vast blue space. If the weather is looking moody and stormy, some dark grey clouds can give you a completely different type of photo. For sunrise or sunset photography if you have low cloud cover it may not allow sunlight to get through. Whereas high broken clouds can mean amazing pictures of the sky. Try to learn and understand the type of clouds that will give you the results you want. Here’s a great article on cloud photography to help you with this.
Add a Point of Interest to Draw the Viewer’s Attention
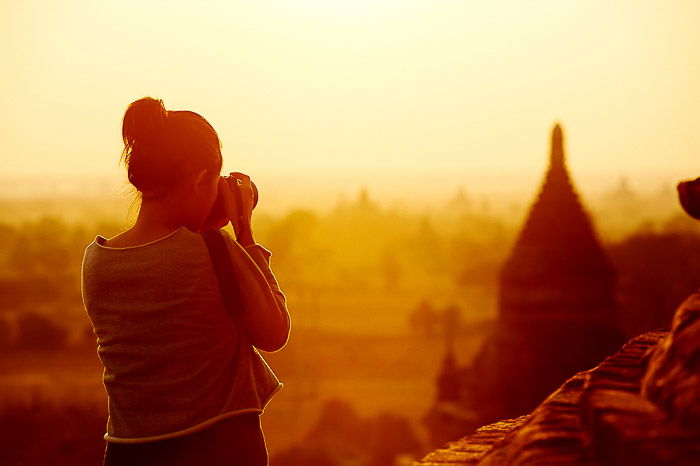
Whilst a dramatic sky picture might look OK, adding a point of interest can take it to the next level. Often the best sky photography will contain a focus point for the viewer to grab their attention. It might be a boat in the lake. Or a piece of driftwood on the beach. It might even be a person standing in the foreground admiring the view. Adding a point of interest to your sky images not only gives them more of a story, but it can also help the person looking at the image to navigate around it.
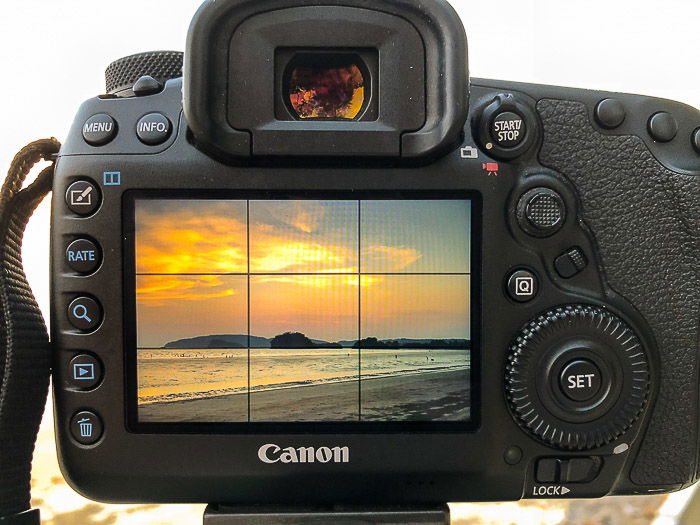
Use the Rule of Thirds to Highlight That Dramatic Sky
Most people who have been involved in photography know about the rule of thirds. It is a compositional aid that can help the photographer frame their image. By placing points of interest on the intersecting lines, it can give the photo a more pleasing look and balance. This also applies to the horizon line by placing it on the higher or lower horizontal line. If you have a dramatic sky place your horizon line lower so that you can show more of the sky. Try to avoid putting your horizon line right in the middle of the photo. It also goes without saying that your horizon line should be straight.
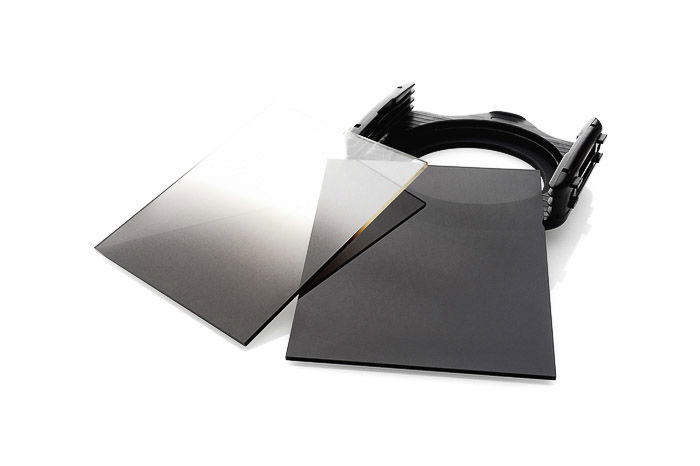
Use a Graduated ND Filter to Get the Right Exposure
The toughest part of executing a sky image is knowing how to expose your shot correctly. The big problem with this type of photography is overexposing your image – particularly the sky. If it’s overexposed too much you’ll end up with a pure white area. This will lack any pixel detail, a term known as “clipping” or “clipped”. There are a few ways you can avoid this pitfall. You can underexpose your image so that you can ensure you are not going to have your white areas blown out. But underexposing will also mean that your dark areas (i.e. shadows) will also be darker. So you may end up having to brighten these in post-production which could mean extra noise in these areas. Another common option is to use a technique called “bracketing” or “HDR“. This is where you will take several images exposing for different brightness areas of the image. You can then merge them into one image in post-production. The third option is often the one that is most common amongst photographers. It is achieved by using a graduated neutral density filter. These glass filters are dark on one end and gradually fade to clear on the other end. By positioning the filter so that the dark area is covering the sky, it helps balance out the brightness across the image to give you an even result, avoiding color banding in your photos.
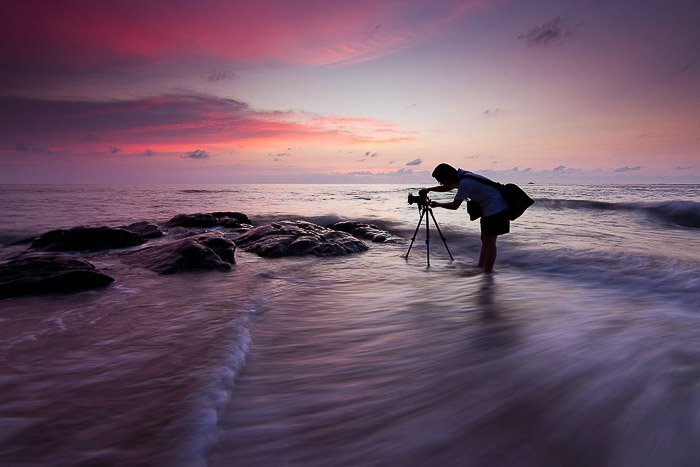
Bring a Tripod for More Creative Photo Options
A tripod might seem like an unnecessary burden to carry, but for great sky images, it is vital. If you are planning on photographing using slower shutter speeds during low light of early morning and late afternoon, then you will need a tripod. Not using one will mean you risk blurred images unless you raise your ISO. But that means you will end up with noise in your images. Having a tripod will also give you more creative options. For example, you can do cloud photography using very slow shutter speeds. This will give you streaks in the sky and make the image look more dynamic. Even though carrying a tripod may seem like a hassle, it will be worth it when you see the results.
Break Photography Rules for More Creative Images
Sometimes in photography, if you want extraordinary results, you have to take some risks. That doesn’t mean dangling yourself off a cliff. It just means breaking a few “photo rules” or trying something that you wouldn’t normally try. Get down low to the ground and you’ll get a different perspective in your image. Shoot with the sun in front of you and let those dramatic clouds be the backdrop to your silhouette. Look for sunbursts which can have a pleasing result in your photos. Or even playing around with your white balance either when shooting or in post-production. Photography is about portraying your creative take on the scene in front of you, so don’t be afraid to be unconventional. Sky photography can provide stunning results. Often the biggest pitfall for newbie photographers is simply having the patience to wait for the right moment. But if you can follow the advice above and have the patience to wait for the right conditions, you will end up with amazing photographs.