[ExpertPhotography is supported by readers. Product links on ExpertPhotography are referral links. If you use one of these and buy something, we make a little bit of money. Need more info? See how it all works here.]
Lightroom Tricks
For many photographers, time is money. And these Lightroom tips and tricks will speed up your workflow.
8. Use Caps-Lock for Auto Advance to Save Time
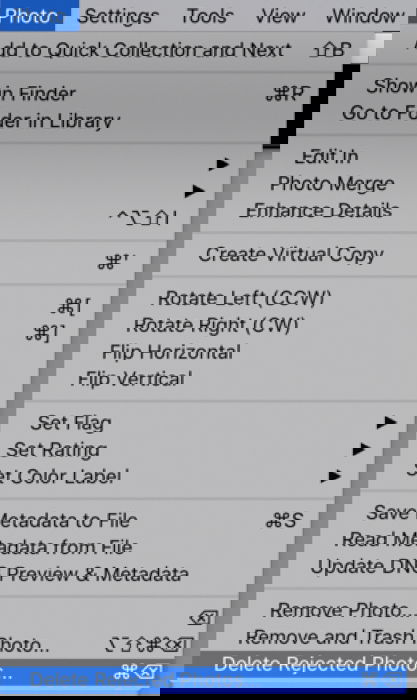
If you cull a lot of images, this tip will be especially useful for you. No matter what type of photography you’re in, the chances are that you sort through a lot of images from a shoot. Wedding photographers often have hundreds if not thousands of images to review. Spending even an extra second on every image can add up to a lot of time wasted. Use caps-lock to “auto advance” through your images in the filmstrip after uploading the files to your computer. To delete an image, simply click onX. Lightroom will black out the image and jump to the next photo. Next, go up to the Lightroom toolbar and choose Photo > Delete Rejected Photos to delete them all.
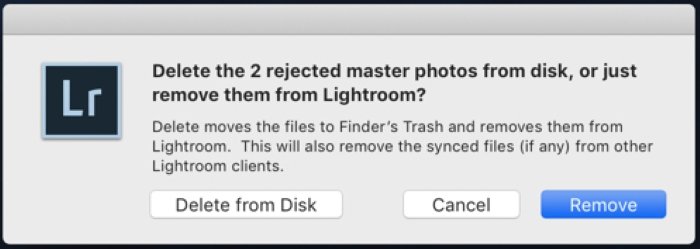
Lightroom will ask if you wish to delete the photos or only remove them from your Lightroom. Removing them will keep them on your hard drive, but they’ll no longer be in your filmstrip.
7. Turn on Clipping Warnings to Avoid Losing Detail
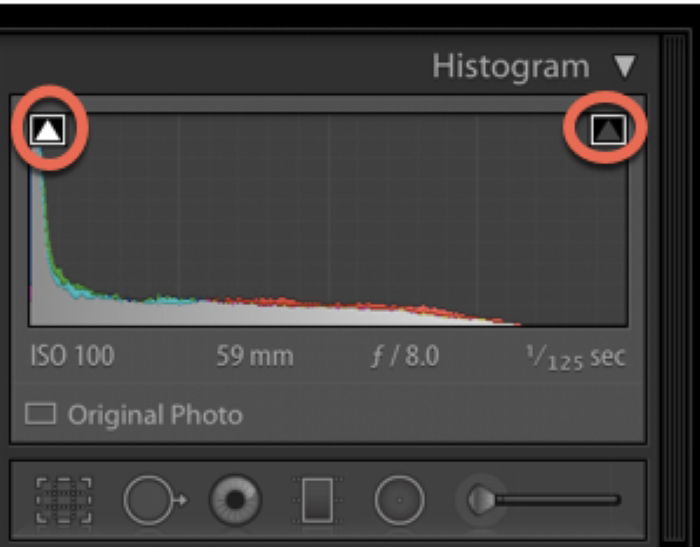
One challenge in digital photography is that you can easily “blow out” your whites or clip your shadows if your exposure is off. Whites get blown out when the far left side of your histogram information touches the very end. This means you have entirely lost detail in the white or light areas of your photo. You cannot recover this detail in post-processing.
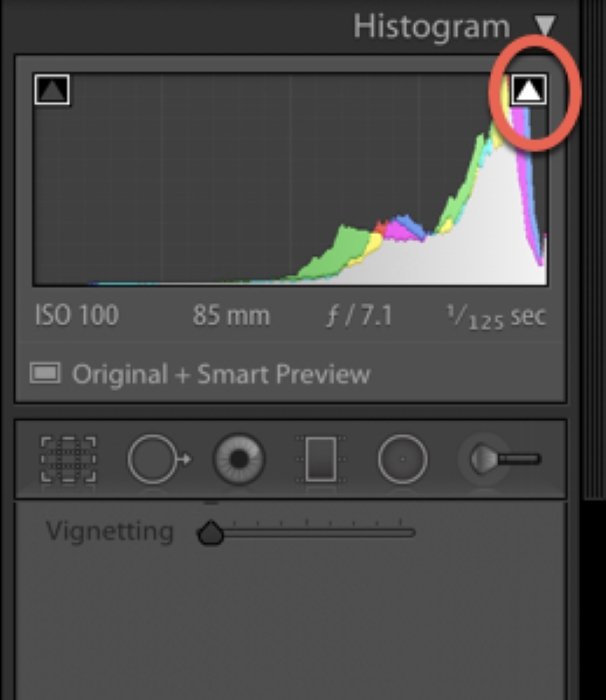
Sure, blown-out whites have become a “thing”, especially in light, airy photography. But they don’t translate well if you plan to print your work. Computer and phone screens are much more forgiving than print. The same goes for blacks. If your blacks go all the way to end of the histogram, you’ve lost all shadow detail. This will be a nightmare to print because the ink will “gang up” on the printer. The best approach is to get everything right and camera and make sure your photo is exposed correctly. Lightroom can help you make incremental adjustments to your exposure. All you need to do is turn on the clipping warnings. These are the small triangles in the top corners of your Histogram. Clicking on the triangles will turn on the “clipping warning”. This warning will tell you when you’re losing essential details in your photo.
The color red will signify this in the parts of your image where the whites are blowing out. Blue signifies areas where you have lost shadow detail.
6. Use Composition Overlays to Refine Your Images
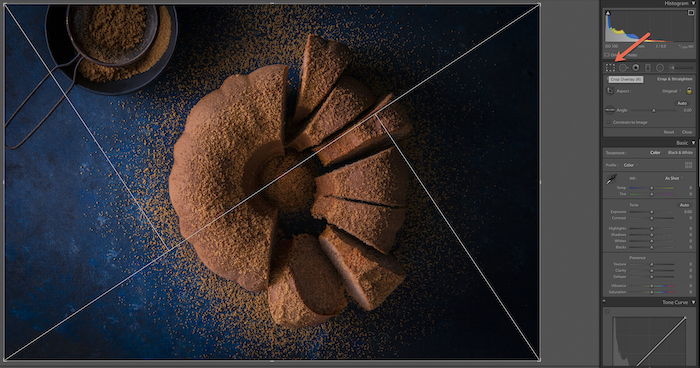
One of the best features of editing in Lightroom is the composition overlays. These are grids and guides that you can activate. They show how your image fits into certain compositional principles. From here, you can crop them as needed. For example, there is a simple overlay for the “Rule-of-Thirds“. This overlay is a grid which divides your image into nine equal sections. The focal point of your image should fall into one of the areas where the lines intersect. This grid will ensure that your photograph follows guidelines for good composition. There is also the Phi Grid, which very similar, but two vertical lines are closer together. The Phi Grid can be more effective than the Rule-of-Thirds. Other overlays include the Golden Spiral and Golden Triangle. Click on the >Crop Overlay tool to activate the compositional overlays. To cycle through the options, press >O on your keyboard.
5. Use Alt/Option to Copy the Graduated and Radial Filters
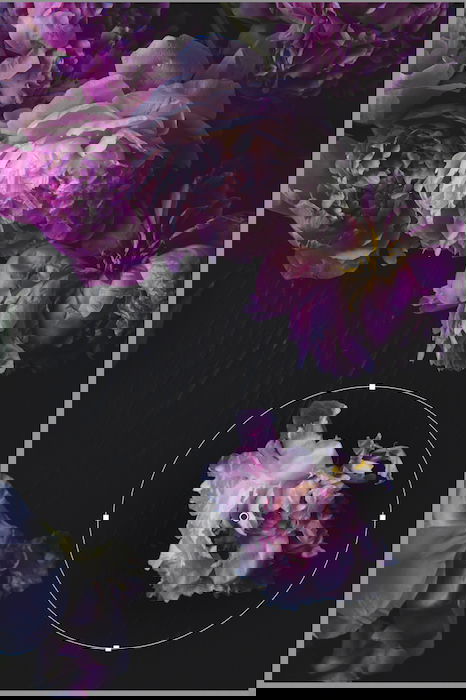
This is one of the lesser-known Lightroom tricks that is super useful. Did you know that you can invert the graduated and radial filters? The graduated and radial filters are tools that allow you to make edits to select parts of the image. You can use most of the tools in Lightroom to make global adjustments. But these tools will enable you to be more precise when retouching your image. If you hold down the Alt/Option key and drag your filter, you can copy your edits it to another part of your photo. In the image of the peonies below, I made adjustments to the lighter peony with the sliders in the Radial Filter tool. I then pressed >Alt/Option and dragged it to the single light peony on the bottom of the image to copy the edits. BONUS TIP: to intensify or lessen the effect of the filter, hold down >Alt/Option while the center dot of your filter is selected. Move your mouse left or right while on the dot to change the effects of the sliders without having to adjust the sliders manually.
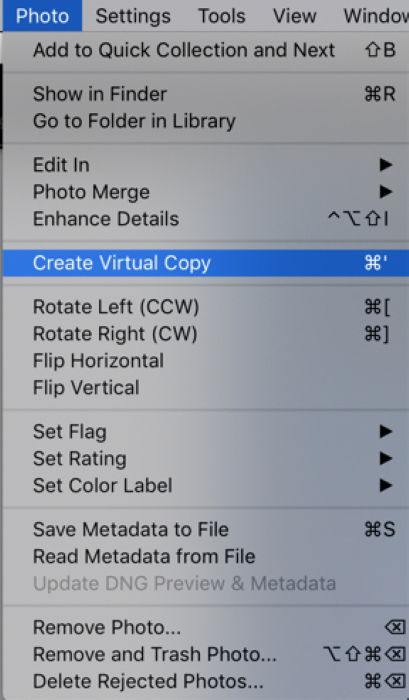
4. Create Virtual Copies for Image Variation
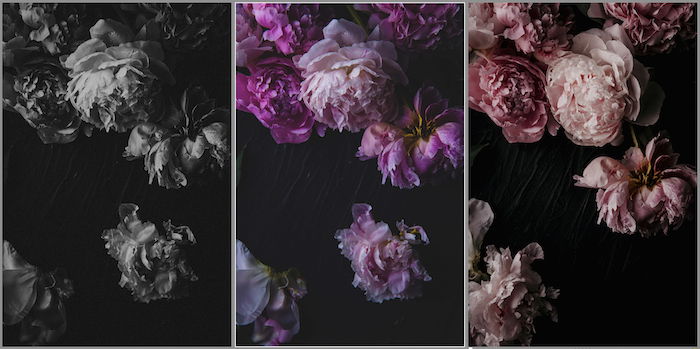
If you haven’t made use of the ability Lightroom gives you to work on virtual copies, you’re in for a treat. As the name suggests, a Virtual Copy is a virtual copy of your image that stores information about the picture. It doesn’t create a second copy of the image on your hard drive. You can export it as a file when you have finished retouching. Virtual copies can be useful if you want to create different effects in your photos and then compare them to see which one you like best. This trick is helpful if you’re going to examine the impact of various presets. Or maybe you need to crop an image but don’t want to crop your original image. Some photographers like to make a virtual copy of every image in their catalog and work on it, leaving the original file untouched. It’s a workflow preference that is up to you but could be worth considering. To create a virtual copy of your image, go to >Photo and choose >Virtual Copy or hit >Ctrl/CMd + ‘ on your keyboard.
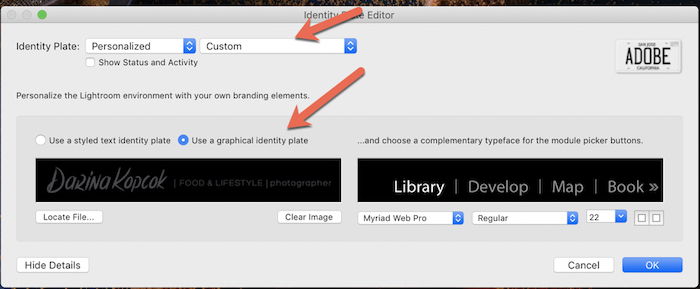
3. Add Your Logo to Lightroom for a Professional Touch
Adding your logo to the Lightroom interface gives it a nice personal touch and is easy to set up. It will also make you look more professional should a client be standing over you when Lightroom is open. A logo associates you with your brand and should make a good impression. To add your logo to Lightroom, go to dropdown menu under the >Lightroom Classic tab in the top left-hand of your screen and choose >Identity Plate Setup. Make sure to choose >Personalized beside the Identity Plate option. Then choose >Custom from the dropdown. Select >Use a graphical identity plate and then >Locate to upload it from your computer. Uploading your logo to Lightroom is that simple!
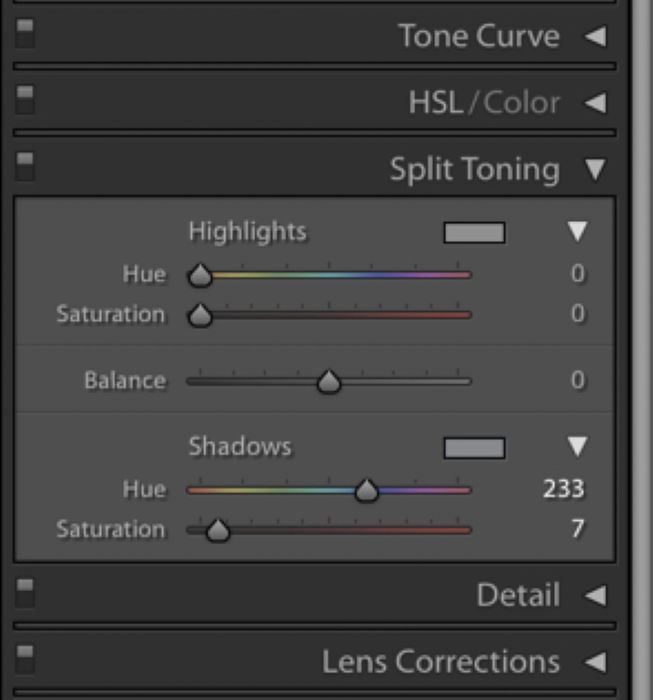
2. Pre-Visualize Split Toning Effects to Create a Signature Style
Split Toning is a powerful Lightroom effect. It can add an extra pop to your photos and help you create a signature style. Split toning is toning that is applied to your images based on luminance values. You can add one color to highlights, and another color to your shadows. But a little goes a long way. A minuscule change on your slider can take your color from subtle to ridiculous. Luckily, Lightroom editing allows you to pre-visualize what any given level of toning added to your image will look like. To do this, hold down the >Alt/Option key while you move the sliders for Highlights and Shadows. You’ll see the variations for each color, which will allow you to be very precise about your selection.
Dial-in as much saturation as you feel appropriate for the image. This is usually a low number. A small amount is often all you need, but it depends on the kind of photography you do. As a food and still life photographer, my images need to look as natural as possible. But I still like to add some warmth to my highlights on occasion, or blue split toning to dark and moody images.
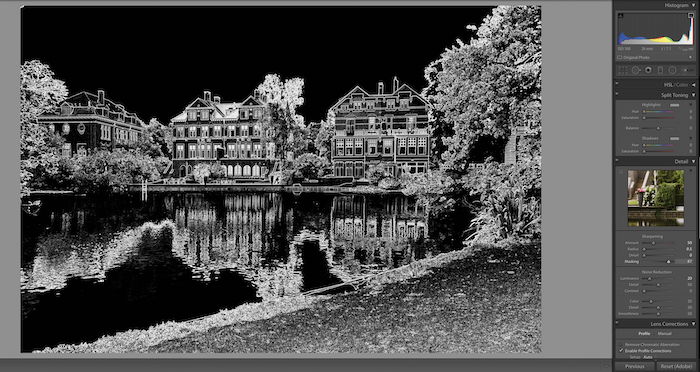
1. Pre-Visualize Sharpening for Perfect Sharpness
You can also pre-visualize edits made to sharpening. If you move your sharpening slider randomly or use the default, you can’t be sure that your images will have correct sharpness. The solution to this? The Sharpening Mask. This trick will allow you to see where Lightroom is sharpening your photos. First move your >Sharpening slider to +50, which is the default. Then hold down the >Alt/Option key and slide >Masking. You’ll see that your image will be black and white and look like an x-ray. This is the sharpening mask, and it shows you what areas are being sharpened. Stop at the number on the slider that looks right for the image. You don’t always need every single detail sharpened like water, sky, or the backgrounds. I tend to sharpen to about 80%.
Conclusion
There are a lot of tips for working more efficiently in Lightroom for improved workflow. I hope this article has given you some Lightroom Classic tips and tricks you didn’t know about. Leave a comment with useful advice that has helped when editing your photography in this powerful software program! We have a full guide on how to use Lightroom for photography you should check out next!