I do most of my post-processing in Adobe Lightroom. But the basic principles apply regardless of the editing software you use. The goal is to get from import to export efficiently. Don’t lose your photographic mojo or let your favorite photography gather digital dust. [ExpertPhotography is supported by readers. Product links on ExpertPhotography are referral links. If you use one of these and buy something, we make a little bit of money. Need more info? See how it all works here.]
Photo Editing Tips for a Faster Workflow
Here are my top 10 editing tips to speed up your workflow. Use what you find helpful. You may even want to set up your workflow differently.
1. Fix Your Images In-Camera to Save Time
Often, you take a photo knowing you’ll have to fix something later in post-processing. But if you can fix it in-camera, you don’t have to fix it later. With a quick spin of a dial, you can change the exposure. Or you can zoom in for a tighter crop or straighten that horizon line. It’s better than fussing with straightening it later in post-processing. That’s especially true if you have to adjust 100 horizon lines individually. You can make adjustments later. But why wait until tomorrow for something that you can do today? Save post-processing time by slowing down in the field and looking at the scene. You’ll probably have to take fewer shots to get the one you want. But the closer the in-camera image is to your final image, the less post-processing you will have to do.
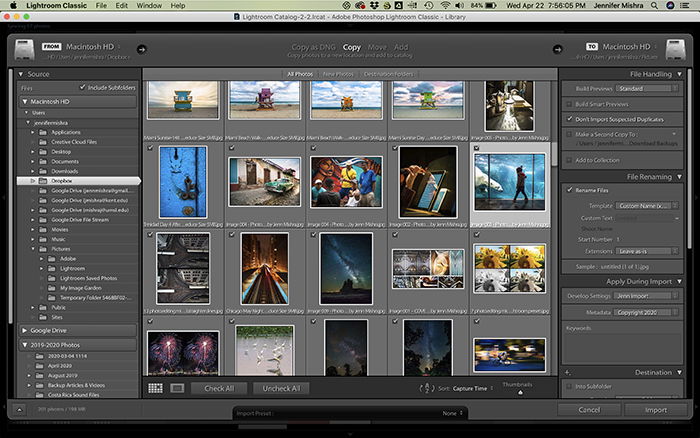
2. Use Import and Export Tools for Edits
Set up your editing software to do things automatically. Lightroom’s import and export tools are a great place to start. You can add global keywords and metadata like titles and copyright information when importing. Keywording is a pain, but you can’t find your images unless you keyword. You will save a lot of time later by taking a few seconds to apply keywords on import. You can even add a develop preset that applies your favorite settings to the imports. You can tweak settings later, but lay the foundation of your post-processing edits on import. When you’ve finished working, you also have export tools. You can rename images and apply output sharpening. Lightroom makes the changes automatically. So you don’t have to think about it.
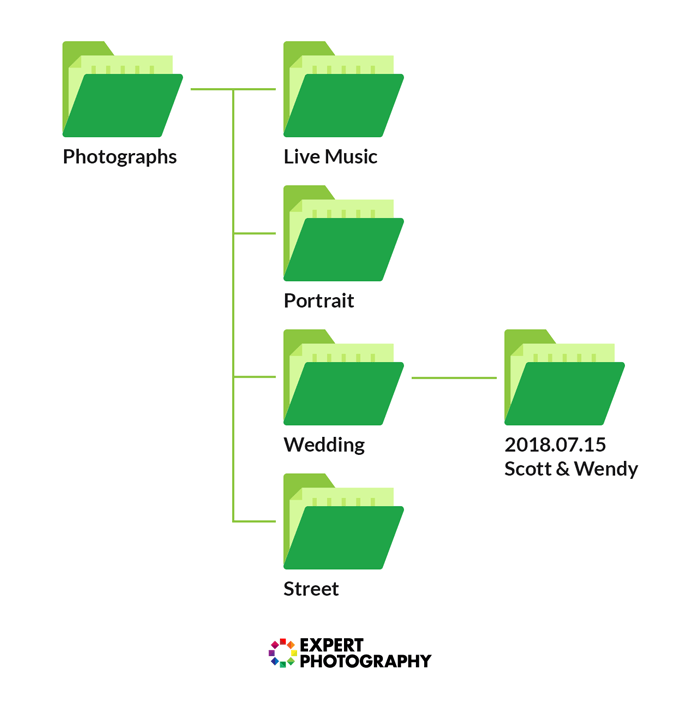
3. Have an Organized System to Find Images Faster
I’ve wasted a lot of time looking for images. If I only had a few photos, I could probably remember where I put them. But after 1,000 (or 100,000), I need a system for storing images. Put files in a place where you can find them later. It doesn’t matter what your system is. Just having a system is important. An example of this might be having a main folder labeled “photographs” and two subfolders. One labeled “wedding” and the other with the date and names of the couple (2018.07.15 Scott & Wendy).
Speeding up your workflow isn’t just about faster post-processing. It’s about having images at your fingertips when you need them. You can use photo management software with AI like Excire Photo to automate steps two and three. They can help you better sort, organize, and keyword your images.
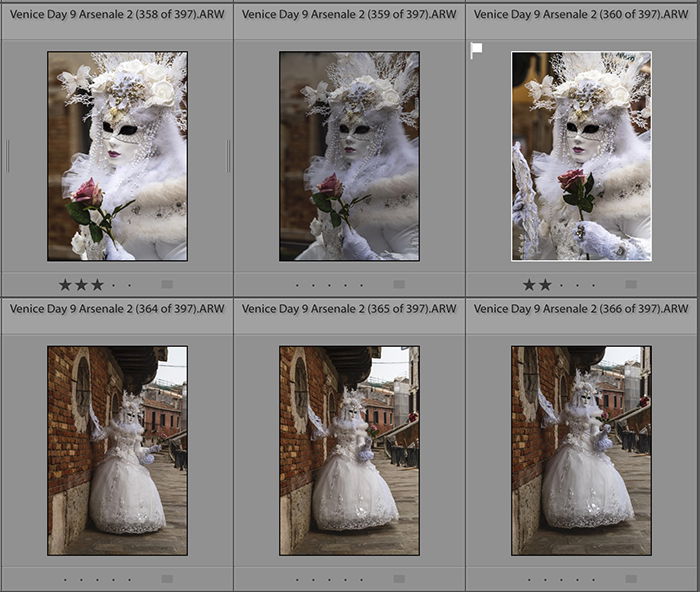
4. Edit Only Your Best Images
Photographers who fly through post-processing aren’t spending time on every photo. They only work on the best of the best. This means having an effective culling strategy. Culling means deleting photos that didn’t work and targeting ones that did. Rank your favorites with hearts, colors, flags, or stars. I go through my images quickly to make an initial selection. Then I do it again, narrowing down my favorites. My top shots get more stars. You don’t have to use my system. Just make sure you have one of your own. I use a system of flags and stars in Lightroom to find my best images. And I only post-process my favorites. I’ve been burned too often. I’ve often post-processed an image only to find better light or composition on the next image. Editing only the best of the best will greatly speed up your workflow.
5. Eliminate Keystrokes to Save Time
Photo adjustments can be highly repetitious. Use any keyboard shortcuts offered by your post-processing program. If you can do an edit with one keystroke that would normally take two, you’ve saved yourself time and energy. It might not seem like a lot but think of all those thousands of photos in your catalog. A one-second keystroke becomes a lot when multiplied by 1000 or 100,000. For instance, use Lightroom’s Auto Advance function. To activate this, place a checkmark next to Photo > Auto Advance. When you add a flag or star during culling, Lightroom automatically advances to the next image. This saves you hundreds of keystrokes each time you cull images. There are many Lightroom shortcuts. X for reject. D to switch to the Develop Module. V to convert to black and white. Here’s a complete list of Lightroom shortcuts.
6. Use Presets and “Auto” for Quick Adjustments
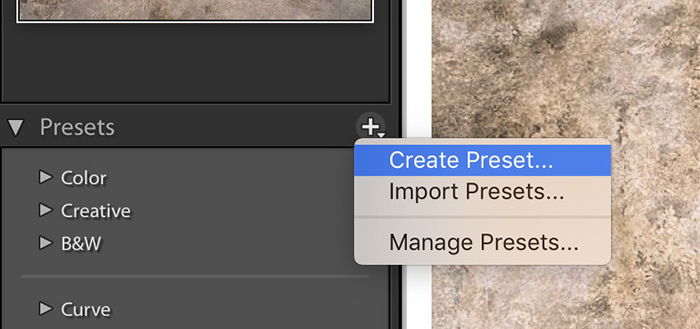
It’s quicker to tweak adjustments than apply them from scratch. Start post-processing by using auto options or presets. The auto-icon usually looks like a magic wand. The software analyzes your image and makes changes. You can see what settings Lightroom recommends by clicking the Auto button in the Basic panel. If you don’t like the results, you can always undo the changes. I like many of the settings Lightroom suggests. But others I tweak. I tend to like a lot more contrast than Lightroom suggests. Lightroom presets or Photoshop filters apply a look to your photography with one click. You can download filters or presets or make your own. In Lightroom, you can save your favorite settings as a preset. To do this, click the plus sign (+) next to the Presets panel in the Develop module. Then select Create Preset.
Saving settings as a Lightrom preset means I can apply them with one click. In Photoshop, this looks a bit different. I save a series of commands as a Photoshop action. Either way, the more you can automate your editing, the faster you will be!
7. Use Batch Editing to Save Time
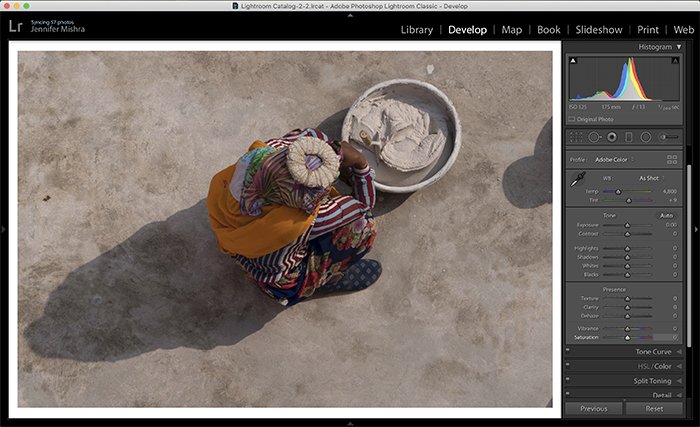
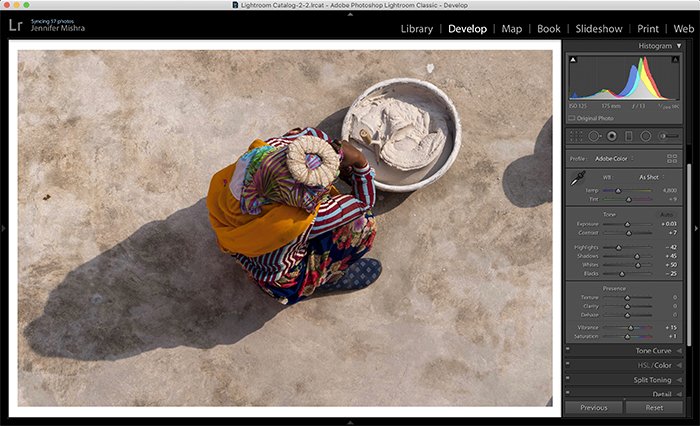
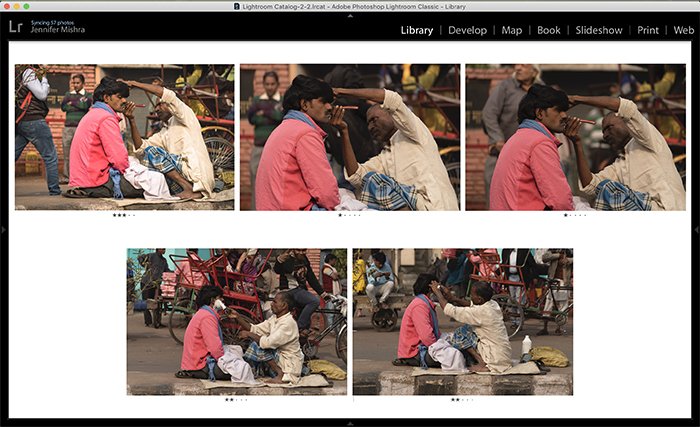
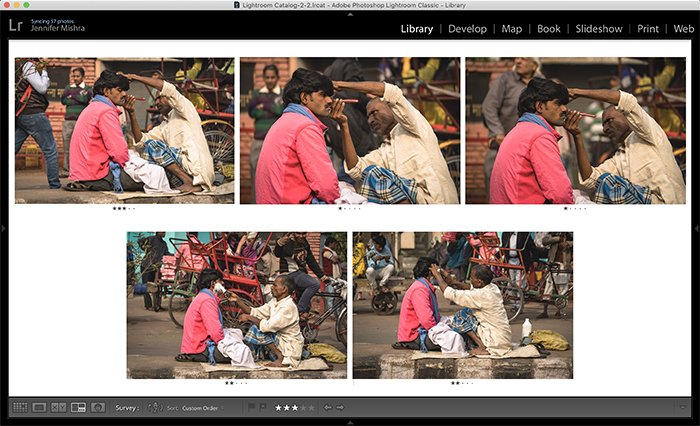
You may often photograph a series of photos in the same scene or with the same subject. They will have similar lighting and camera settings. So there’s no need to post-process each image separately. Instead, do a batch edit. Batch editing means post-processing more than one photo at a time. There are a couple of ways you can do this in Lightroom. You can copy and paste the settings or use the Sync button. Start by editing one photo. Then, select the image you’ve edited to copy your settings and go to Edit > Copy (Ctrl or Command+C). A dialogue box will appear, asking which settings you want to copy. You can check all or individual settings. Then select an unedited image and paste the settings Edit > Paste (Ctrl or Command+V). To sync settings, select all similar photos starting with the photo you’ve edited. Click the Sync button in the Develop module. That’s it! Your settings will be applied to all of the photos. It doesn’t matter if you selected 20 or 200! It’s easy to apply settings from one image to another. Here is a before and after sync.
8. Streamline Your Editing Process
Once you start editing images, have a system. It doesn’t matter what that system looks like. Just make sure you make the same adjustments in the same order. Some photographers go straight down the Develop Module panel in Lightroom. They fix the Basic settings first, then move down the list. Don’t be afraid to skip over the settings that don’t apply to your photographic style. My first change is composition. I crop the image. There’s nothing worse than removing dust spots, straightening lines, and adding a vignette… only to crop out my hard work! After cropping, I move on to contrast, highlights, shadows, color, and details. Decide on the settings you care about most and make changes in the same order. If you often have to go back to readjust a setting, don’t be afraid to change the order. For instance, adding dehaze often darkens the image. This means I have to go back and readjust exposure.
9. Edit on the Go
I often sit on a plane, train, or bus, going home from a session. And I’m itching to start post-production. I’ve learned to put that time to work. You can set up a mobile post-processing workspace on a laptop or mobile device. Most editing software can be downloaded onto your laptop. And Adobe Lightroom Mobile is one of many editing apps for your smartphone. This may not necessarily replace your primary workspace. But you can get started editing. By the time you’re home, you can have images imported into Lightroom, keywords added, and images culled.
10. Be Decisive
When I think about the things that slow down my workflow, I have to admit that most of the time, it’s me. There are a thousand ways to edit a digital image. I am at my most efficient in post-processing when I’m decisive. I waste time when I go back and forth between possibilities. There’s no harm in trying a few different ways of post-processing an image. But then I need to make a choice. And it’s easier if I only have two choices in front of me. This photo or that? Should I use this white balance or that? In the end, there is no “right way” of post-processing an image. It only matters that you like it! To speed up your workflow, you can use software like Imagen AI. This is a program that uses artificial intelligence to optimize your photos. You can read our full review on Imagen AI.
Conclusion
This article is more about streamlining how you deal with your images than how to edit photos. Spending more time at the beginning of the process will stop time from being wasted later on. I use these tips when it comes to my work, and it took a while for the process to become streamlined. But feel free to find your own way. And share your tips in the comments below!